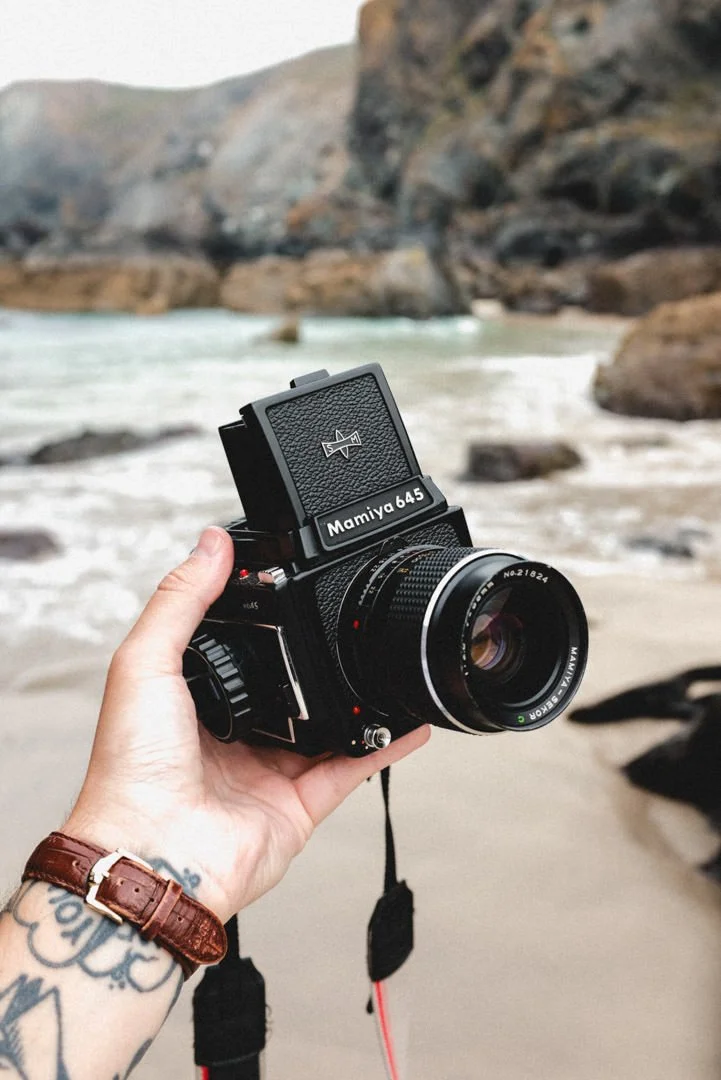
The Mamiya 645 Medium Format Camera
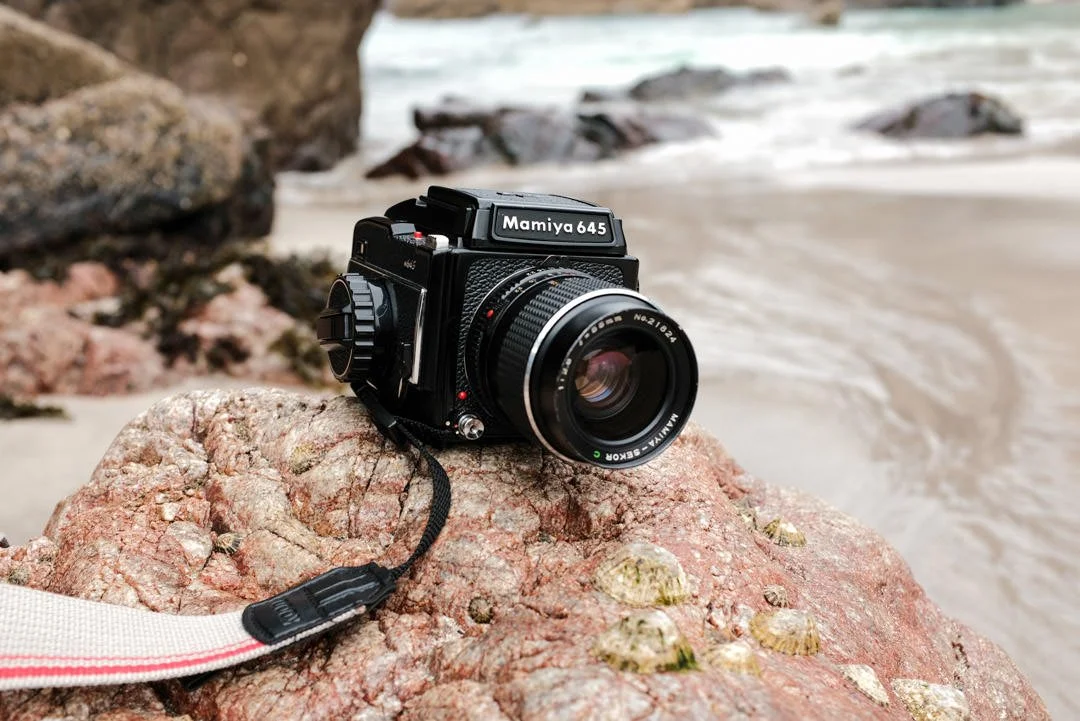
The Camera itself.
I had been shooting 35mm film for about 1 year, and the day came when I discovered medium format, leading me to finding the Mamiya 645. These cameras were released in the 1970’s, they have metal bodies and will give you 15 shots per roll. There are different variants M645 1/500s, M645 1/1000s, and the Super, Pro and Pro TL versions with removable film backs, allowing photographers to swap film stocks mid-shoot. The camera does not have an internal light meter, meaning you will need to read the light yourself and manually input your aperture and shutter speed. For this get yourself a handheld light meter or spot meter. There are also apps for mobile such as Lightme that i’ve been using more recently.
The version of the camera I purchased was the 1/500s model, and although this might seem a little slow it really has been enough. The camera has the well known feature of the waist level viewfinder, with an optional prism viewfinder that can be swapped over and also multiple exposure switch. As it is a medium format SLR you can purchase many lenses to swap at your leisure. Mine came with the 55mm f2.8, where I later purchased the 150mm f3.5 & 45mm f2.8.
Across these 3 lenses that gives me the 35mm equivalent of - 35mm, 90mm and 28mm. This is due to the medium format crop factor of 0.6x - 0.8x. When purchasing the Sekor C lenses for the Mamiya 645 it’s always good to research this so you know what focal length you are getting to suit your needs.
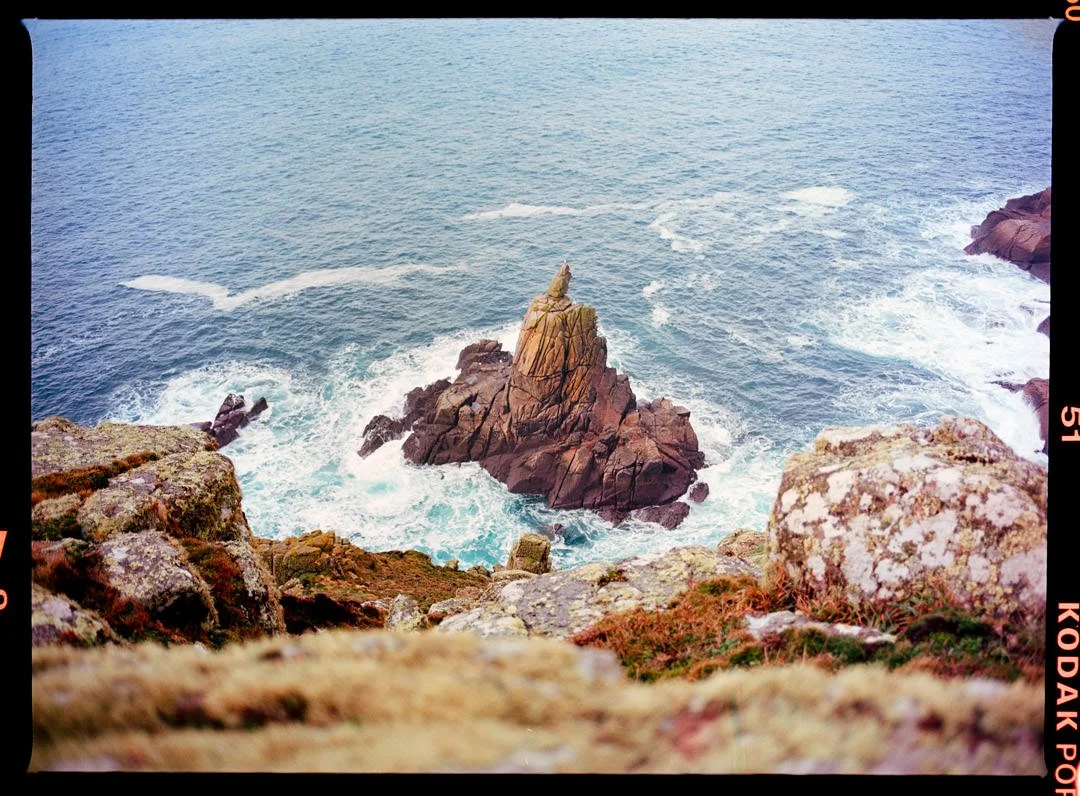
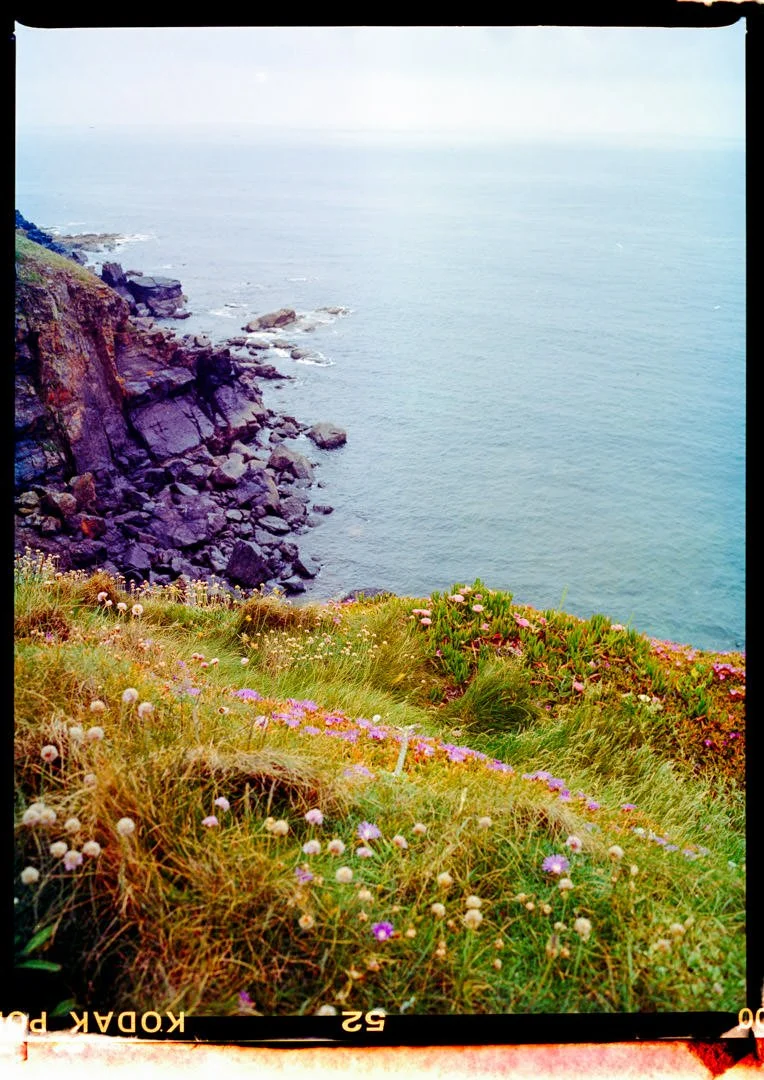
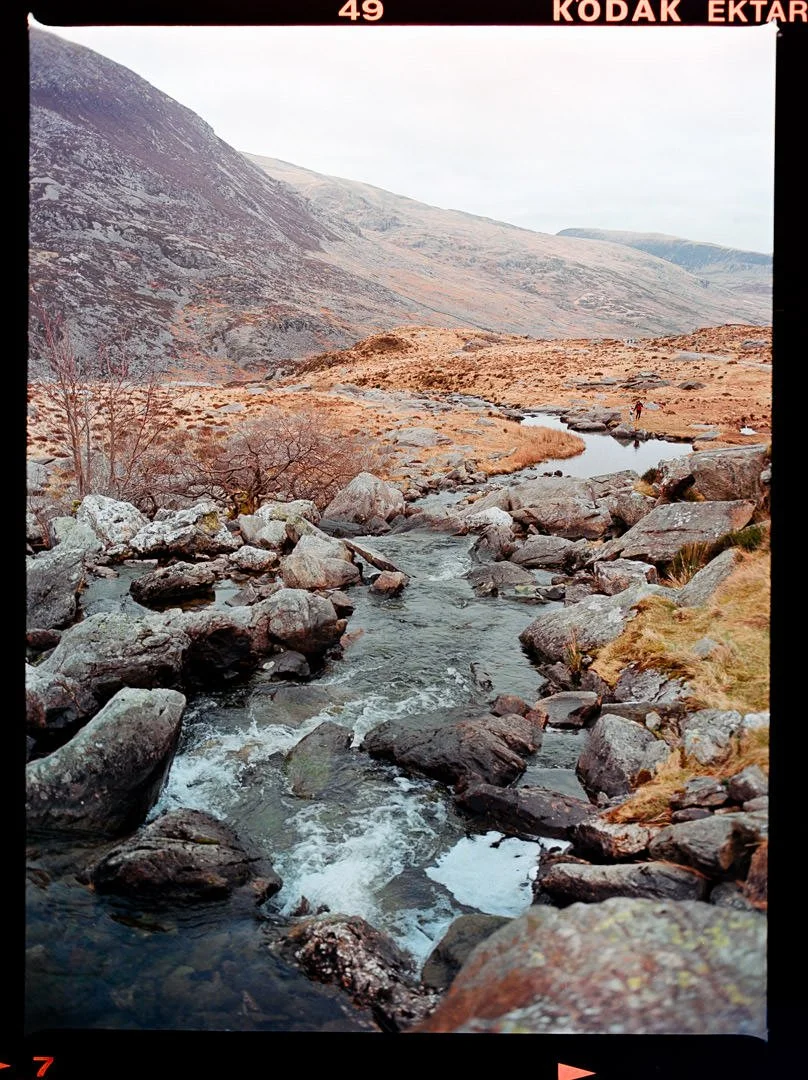
Kodak Portra 160 - scanned and cropped with straight edge border.
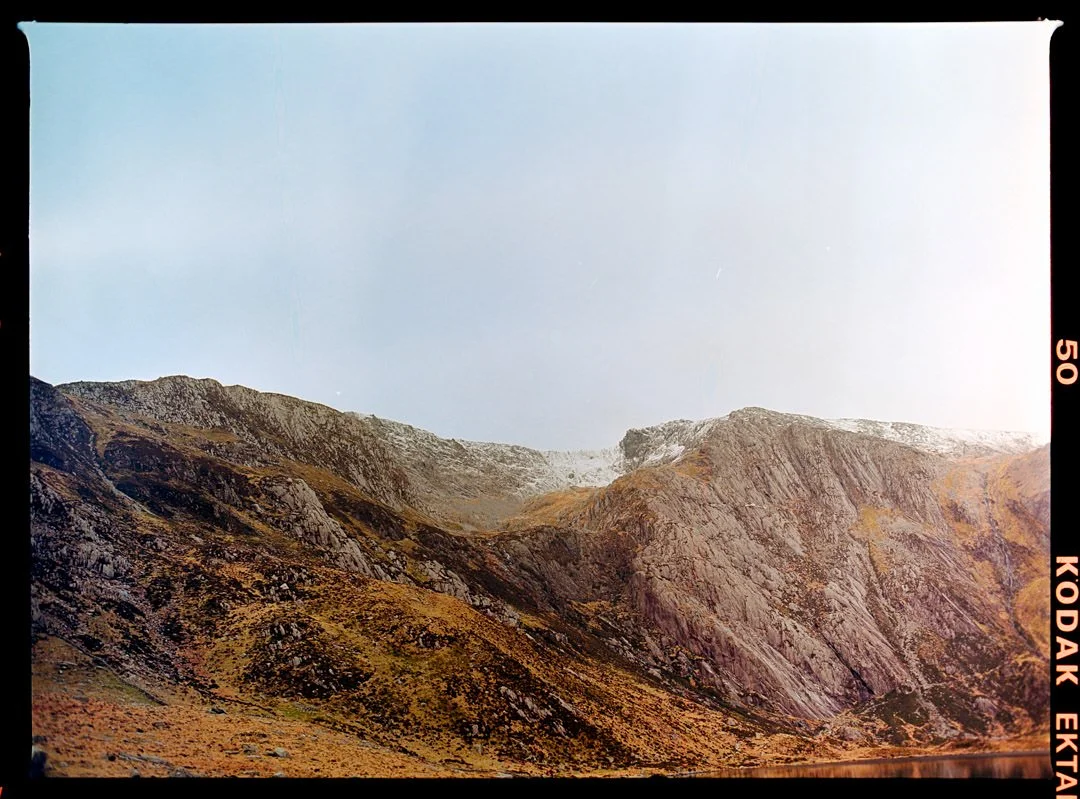
Kodak Ektar 100 - scanned and cropped with straight edge border.
Film negatives from Mamiya 645 on Kodak Portra 160
Why bigger negatives such as 6×4.5cm?
120 medium format film is used for a few main reasons. The negatives will give better tonal gradations, finer grain and higher details. This is great for photographers who want to print their negatives as these will only need to be magnified around 3x, where as a 35mm negative 14x. I scan my negatives on a Nikon z6 at 24MP, but one day would like to progress to a higher megapixel mirrorless for this.
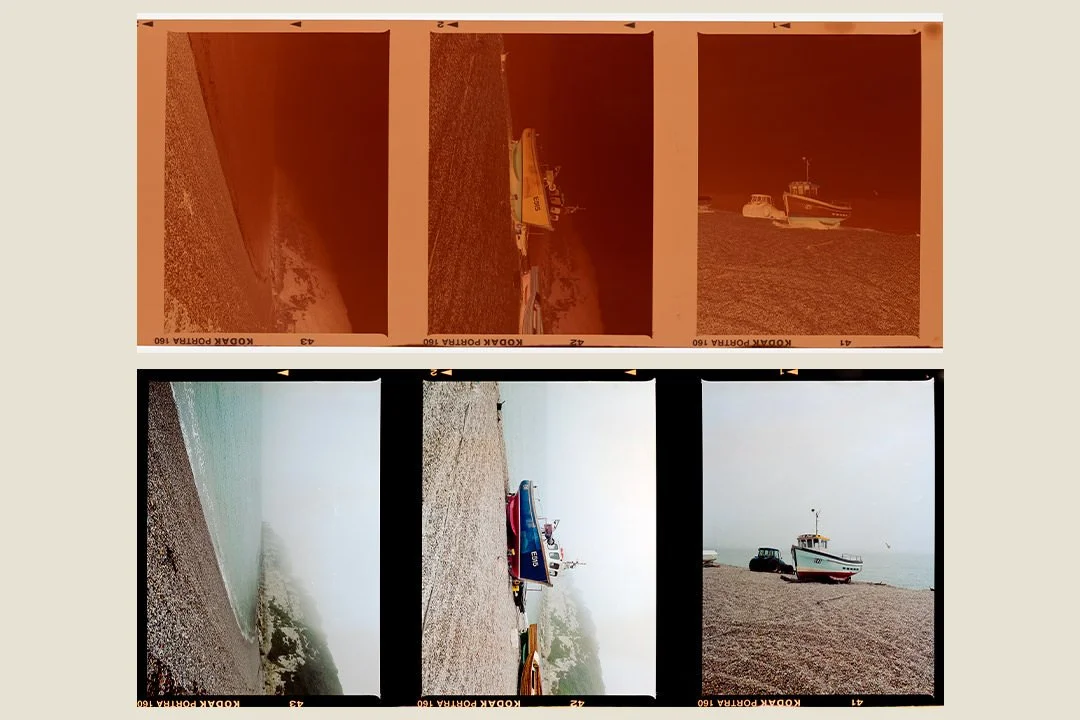
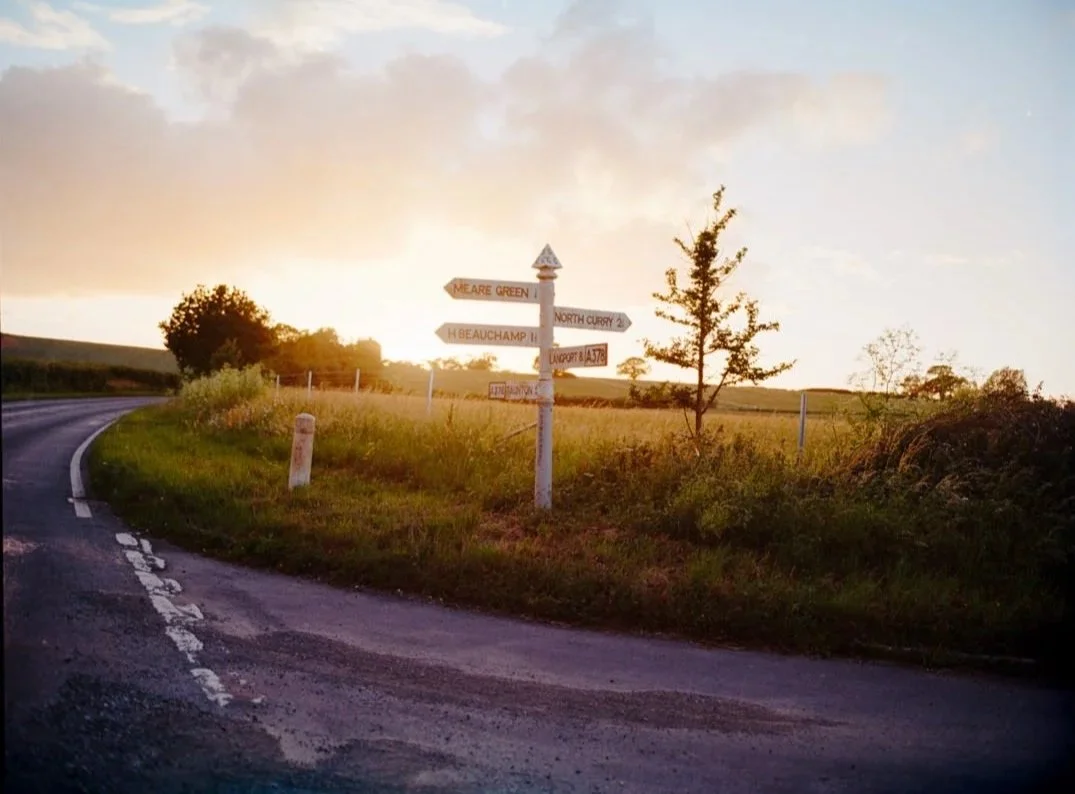
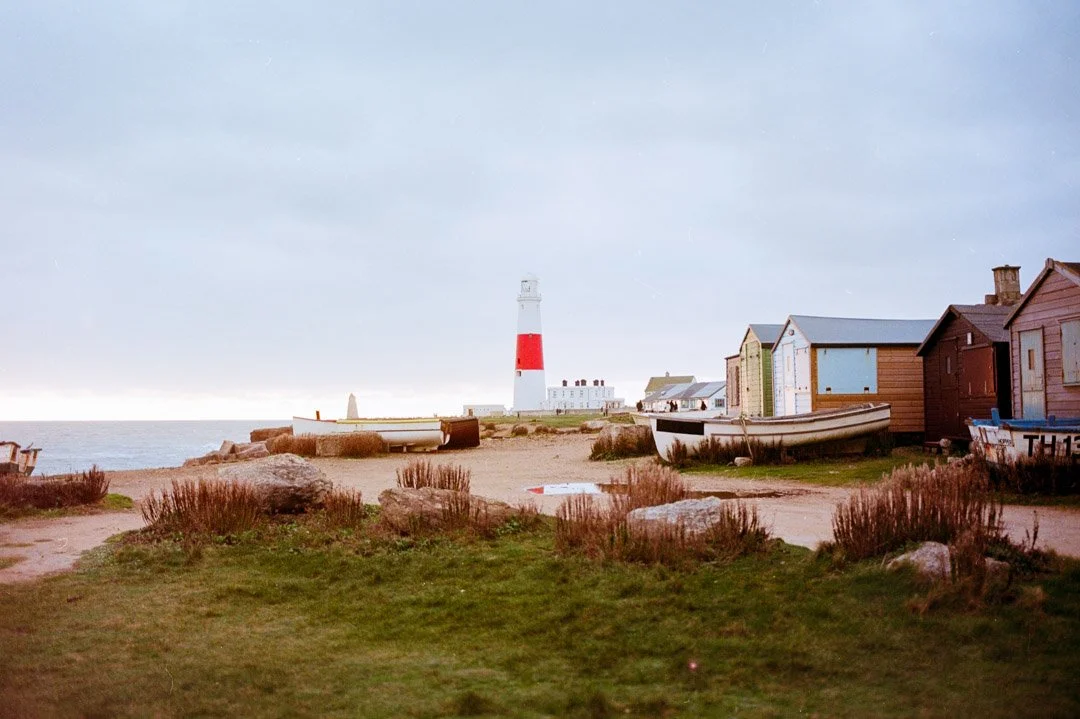
With 35mm film you are locked into that format, where as with a roll of 120 film you can use this in other medium format cameras that may offer different aspect ratios such 6×6cm squares, 6×7cm and 6×9cm for even bigger negatives. These cameras are most probably manually wound on between each shot, meaning there are no sprockets holes, giving clean film borders as seen in the attached images. I love the vibe these can add to a photo, with scanning and you can create your own masks from cardboard to give a rugged look, as I will also show in this post .
Kodak Portra 160 - scanned with custom cardboard mask to give rugged edges
Kodak Gold 200 - scanned with custom cardboard mask to give rugged edges
Kodak Gold 200 - scanned with film borders cropped away.
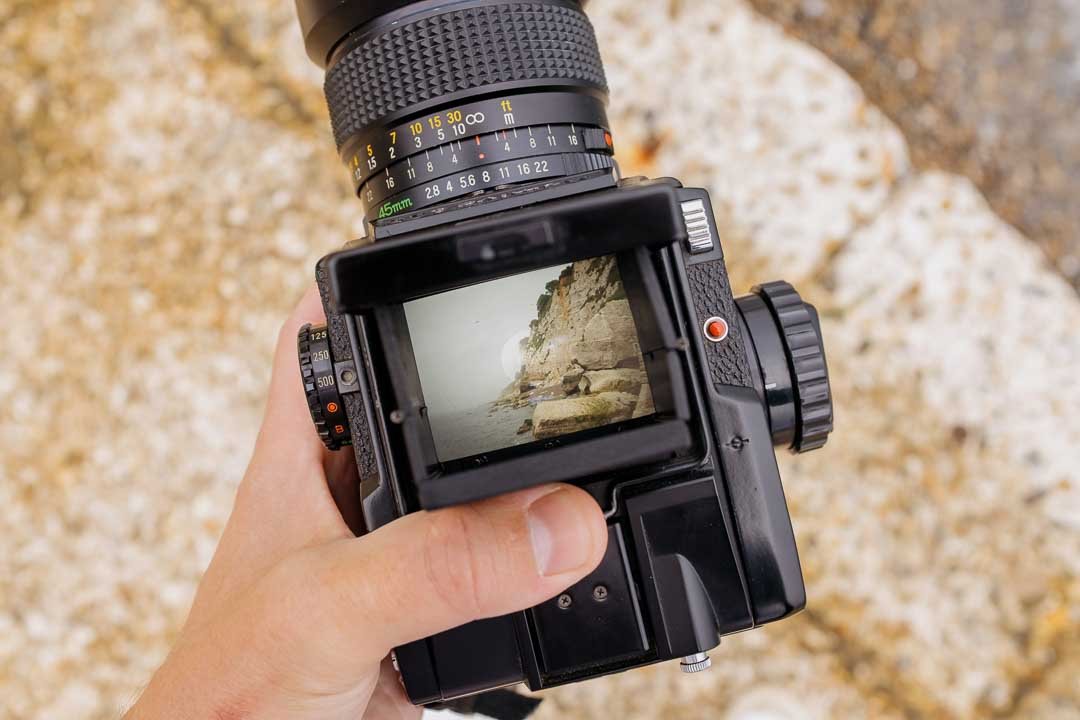
The famous waist level viewfinder.
Now if I was to put money on why you like the look of this camera, I would bet it’s because of the waist level viewfinder. There is something very pleasing about seeing your scene illuminated onto a little piece of glass, using only the light entering through the cameras lens. The screen is kept hidden away under the flip up cover, and the whole module is also removable where a prism can placed on the top.
Using the viewfinder is fun, but it will take some time to get used to. First off everything is in reverse. As there is only one mirror the scene will be displayed in reverse, when you move left the frame will move right and the same opposite with up and down. With a normal camera there are two mirrors, one first receiving the image behind the lens in reverse, this is then bounced up at a 45 degree angle onto another mirror - in your viewfinder. It is then corrected to the right way for viewing. Using this will to start with will make you feel almost drunk but after 5-6 rolls of film you’ll get used to it. For me now the hardest part is keeping the horizon line straight.
This whole way of shooting like this brings back an original feeling to taking photos, looking down into the viewfinder really pulls you into the image. The viewfinder also has a pop up magnifier so you can place your eye just above the viewing plate, this is where you will find focus easier and be able to see small details.
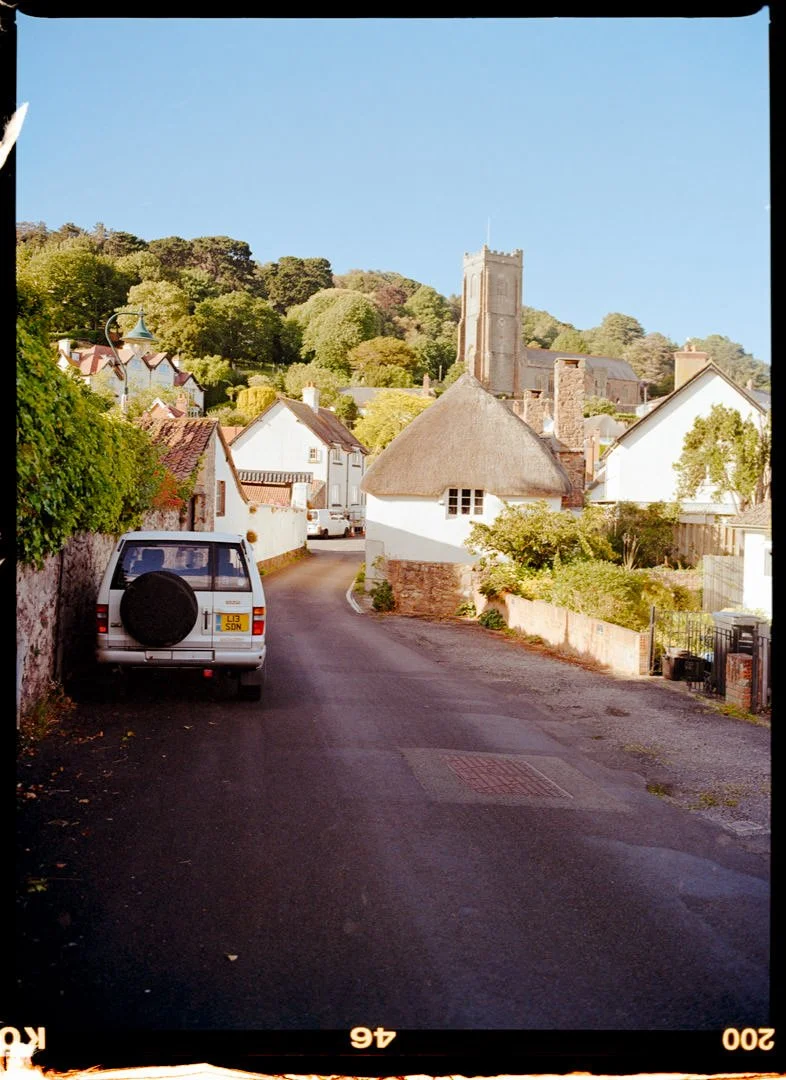
Kodak Portra 160 Sekor C 45mm 2.8
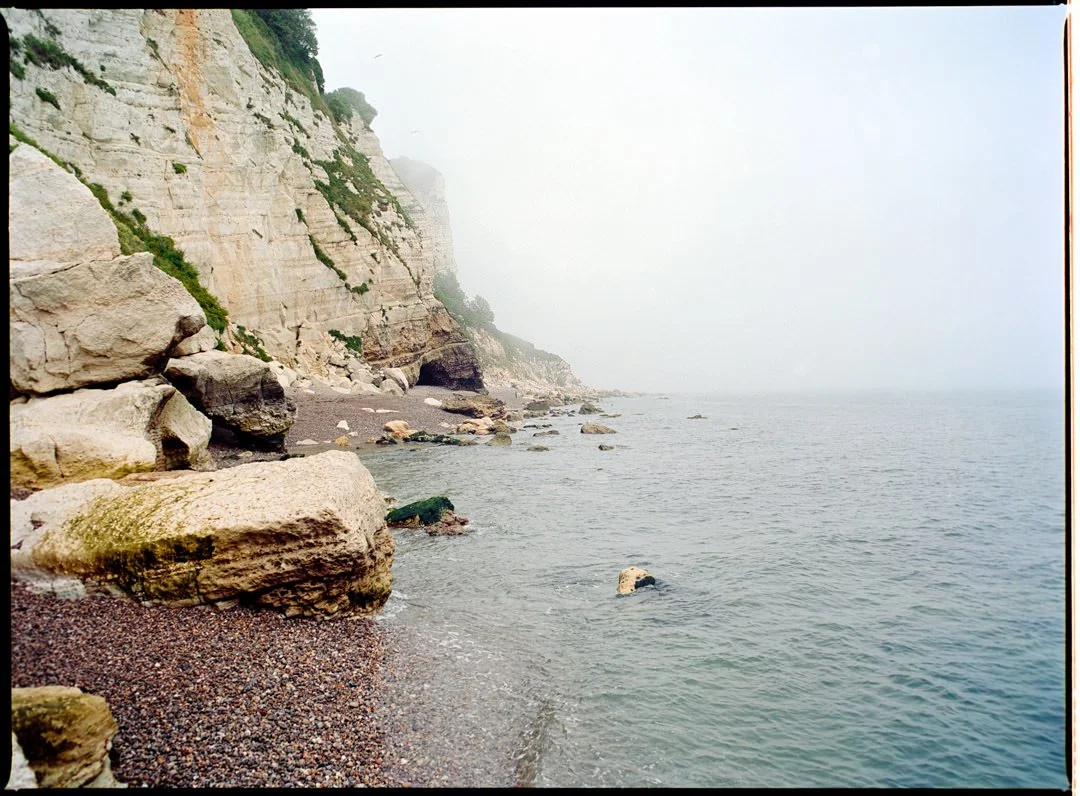
Kodak Ektar 100 Sekor C 55mm 2.8

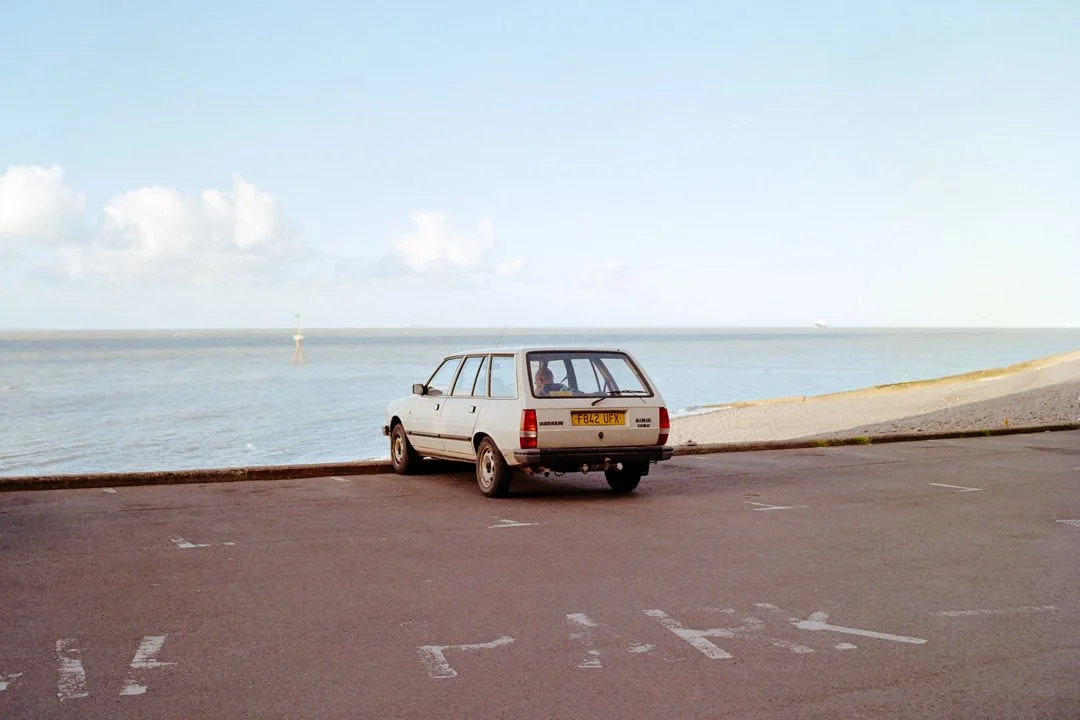
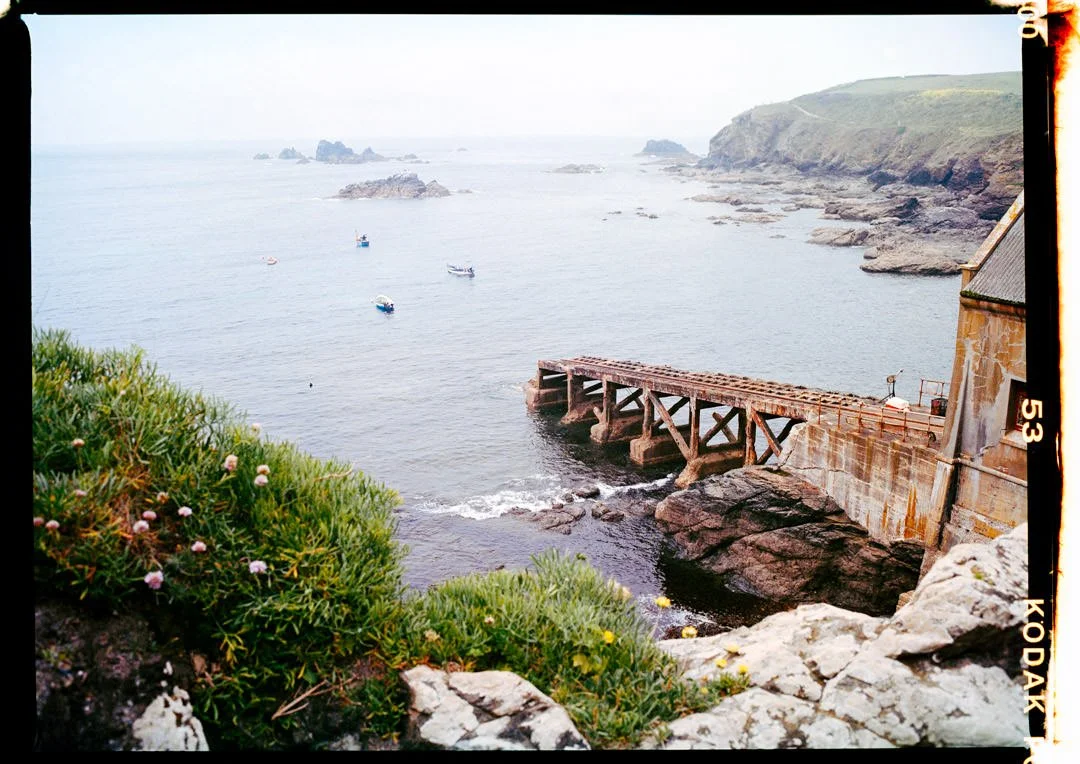
Kodak Portra 160 Sekor C 55mm 2.8
Kodak Portra 400 Sekor C 55mm 2.8
Camera functions and operations.
The camera will require an 4LR44 battery, this is used for it to release the shutter and I’m still on my first battery after 2 years. The camera is manually wound on between each frame cocking the shutter for the next shot. It is manual focus and manual exposure is required, this for me was where I really started to learn how a camera works. The camera has a shutter counter on the side, a lever for mirror up lock and a lever for double exposures. The camera has no on of off button, its primes when its wound on to fire. The battery sits inside idle and doesn’t consume any power and these batteries can be found online in packs and are really cheap.
When firing the shutter you have the choice of two shutter release buttons, one on the top face of the camera to the right, and one below the lens to the side. The shutter speed dial is on the left hand side of the body, and apertures are set on the lens itself. The there is also a test battery button on the top giving you a blinking light to tell you that there is power in order for the shutter to fire.
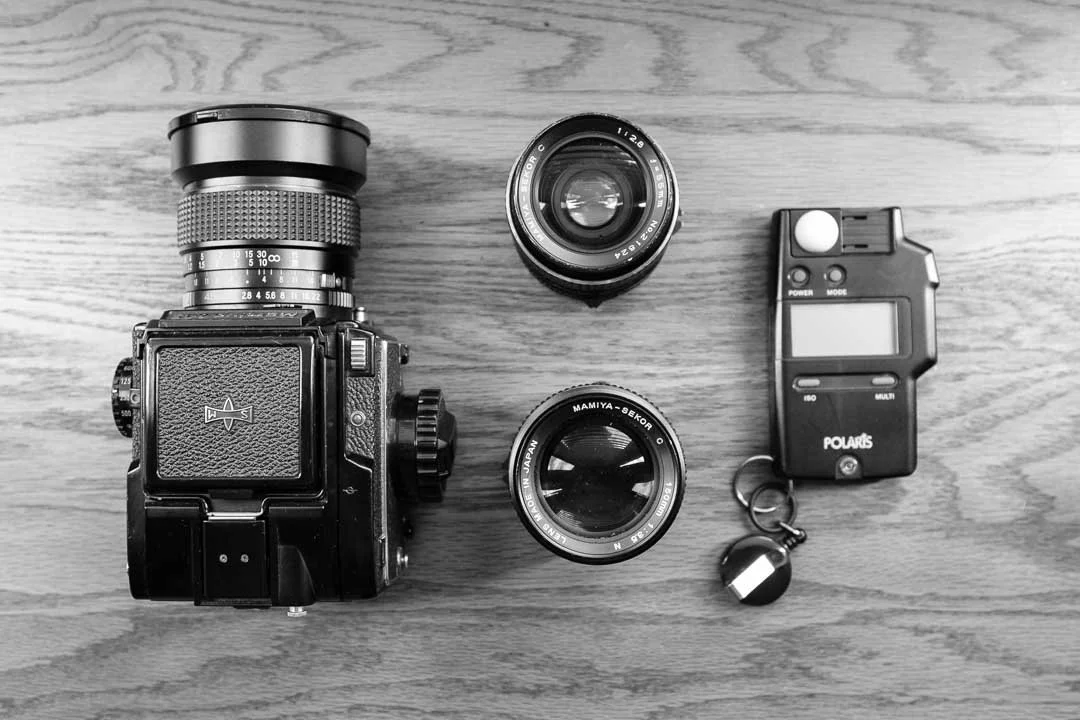
Mamiya 645 camera with 45mm, 55mm and 150mm lens. Polaris light meter also shown.

Kodak Gold 200 Sekor C 55m 2.8
Kodak Gold 200 Sekor C 55mm 2.8
Mamiya 645 taken on Fuji X100f
Kodak Ektar 100 Sekor C 55mm 2.8
My own thoughts on the Mamiya 645 film camera.
This camera when first learning to use will seem like hard work, as you will need to manually expose and dial in your settings, then you will manually focus and also deal with the opposite movement in the viewfinder. After a while this all becomes second nature and you will be rinsing rolls of 120 before you even know it. The camera itself is a fair sized lump, weighing 1.6kg with the 45mm lens attached. Get yourself a decent camera strap and some strap lugs and it will be solid over you shoulder when walking around.
The positive things that keep me coming back is the experience of using it, the image quality and its solid build. Mine did need sending off for service when I bought it, and this was worth every penny. This camera has never dropped a frame or malfunctioned across the 50+ rolls I have put through it. For landscapes and general days out it serves all my purposes. Other than this medium format I do have a Yashica 6×6, but if this camera failed tomorrow I would have it sent off for repairs straight away as it has become a staple in my camera collection.
Once you shoot something like this youll say 35mm is rubbish, then you will bounce back to 35mm, and then back to 120. With 120 film you get less images but the quailty and tones are just different. 35mm is better when you know you want more photos of something. For landscapes’s and scenarios where you don’t need to rush the Mamiya 645 comes out of the bag.
If I was to upgrade, or start again id get the 1/1000s version, to just give me that little more bokeh on a bright day, but it really isn’t that much of an issue.
Kodak Ektar 100 Sekor C 55m 2.8